7 Important CCTV Installation Steps
June 22, 2020
CCTV Audit Checklist 2020
September 8, 2020How to Install Security Camera Wiring?

Wondering how to install security camera wiring? A common issue faced by a lot of people who are installing CCTV cameras for home security is getting the appropriate installation for wires.
So, if you’ve gotten stuck in finding the right ways of running security camera wiring and cables out of the house. You’ll also get a step-by-step guide on showing the right way of installing indoor and outdoor camera wiring for security.
Even when for the first time you’re running the cable for security camera, you can also install security camera wiring through the walls/attics for the back/front door area, back/front yard, reception room, garage, bedroom, parking lot, basement, entrance, farm and also upstairs, etc. in a simple and quick manner.
Table of Contents
Things Required for Wiring Security Cameras

Make sure to prepare the necessary items listed below:
For the PoE CCTV cameras:
- Launs (recommended for analog system)
- Ethernet cable
- Drill
- Masking tape
- Steel fish tape
- Keyboard, mouse and monitor
- Friend for helping out
As you’re going through the process of installation, you can decide on using the appropriate tools for making things simple depending on certain situations.
How the Wired CCTV Cameras are Set Up?

Before getting right into the installation process, you firstly need to know that everything has been connected.
Most of these security systems have a DVR box along with a few cameras.
All cameras have direct connection with DVR box. This is either done through NBC cable for the analog camera systems or from the ethernet cables meant for the digital systems.
If you’ve got an analog system, it is highly recommended to skip BNC cable and get special adapters known as baluns, allowing you to make use of Ethernet cables – as these can be installed simply and overall are a lot more modern.
As cameras plug directly in DVR boxes, it means that when you’re installing a camera through the back patio and DVR box remains upstairs in the home box, you would require routing camera’s cables through the house for connecting it with DVR box system.
This might be a little complicated, based on the house structure.
Step 1: Select the Location of Cameras

In houses, the most preferable place is on the soffit (area beneath roof overhang), in that way cables travel directly through the attic.
Coming to wired security cameras installation, it isn’t enough for picking spots and mounting these.
For example: Getting the CCTV mounted on the outdoor wall beside the front door in the corner is great, but routing cable towards the DVR box can be challenging.
Thus, instead of mounting on an outer wall, you can try mounting it on front porch ceiling.
Step 2: Preparing Camera Installation

Depending on exact camera installation, you require different tools compared to the ones used for your day to day tasks. Most likely it’s best to get a hammer drill with masonry drill bits.
In different cases you can begin by marking hole for feeding the CCTV wires through, and holes where the mounting screws of cameras remain. Some kits are available with template sticker making the job a lot simpler.
If yours aren’t available with all these, you can hold camera up wall or ceiling where you require it and mark all holes with pencil.
You should get power drill, drill but and the drill pilot holes where mounting screws go. Then you can drill larger hole in center that cables feed through. Typically, you need use of spade but for larger hole, but you can find regular drill which is large enough.
Step 3: Run Wires to all Cameras

After drilling, you should run security camera wiring to different CCTV locations.
Also, this is where order of things would be different based on particular situation, but typically you drill holes either through ceilings or walls for feeding the cables where you want these to go.
For the installation, all cables, cameras would converge in attic above the garage, and from here on all cables feed up in main attic above second floor.
Security camera wiring becomes simple with steel fish taping. Put the fish tape in the hole that you drilled for the camera.
After fish tape extends far enough in attic for simple access, you can tape the cable end to fish tape and also pull fish tape from outdoors for threading cable through the drilled hole. You can get help of a friend for this job.
Step 4: Now Run Cables to DVR Box

For this process you’ll again require fish taping, along with the drill. Now how you’re mounting DVR box is completely up to you as most people have the mounting holes on back, similarly to the surge protectors and power strips. Also, you can sit it on tabletop or desk of any kind.
Fish tape is necessary for pulling cables through ceilings and walls, and you might also end up taping wires to fish tape, while pulling them through and removing them while also repeating the process various times through various walls before cables finally arrive at the destination.
Step 5: Now Install Cameras

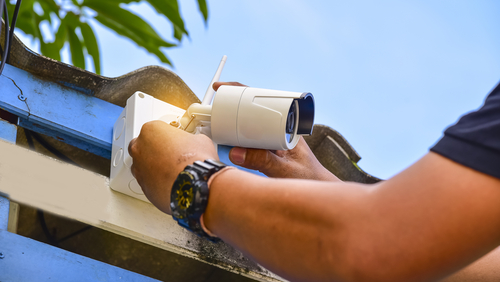
Connect the cable coming through the hole to the camera and then feed the excess back in the hole. For convenience, you can wrap the connection with electrical tape for securing so it doesn’t get unplugged through an accident.
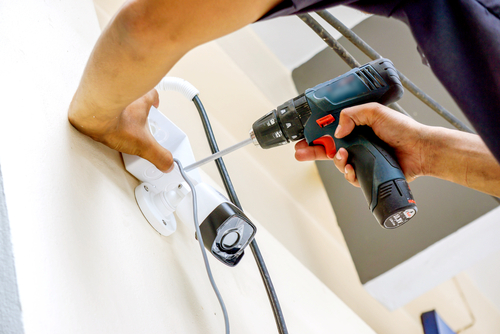
Now grab mounting screws coming with the kit and also using a power drill for mounting the camera in the house.
After installation of cameras, you can also make rough adjustments for the camera after losing adjustment screws and tightening these back when adjustments are made.
How to Install Security Camera Wiring? – Conclusion
Now after connecting security camera wiring and setting up the DVR, you’re fine to start with the security system, but you must save some time for navigating through essential settings for customizing things that are recommended, whether your cameras record 24/7 or only in motion.
You can start testing once you’ve got the cameras up and running.


