5 Benefits of Construction Site CCTV Cameras
May 13, 2020
How to Install Security Camera Wiring?
August 4, 20207 Important CCTV Installation Steps

With the increase in criminal cases and anti-social elements in society today, the need for security cameras is on the rise. Security cameras are significant innovations in technology. Camera installation is more common in homes and business establishments. Hiring professionals for camera installation can be expensive; on the other hand, doing it yourself can be time-consuming. The following are the 7 important CCTV installation steps you can follow and install your camera more efficiently by yourself.
Table of Contents
Prior planning before installing the camera

Pre-planning is a critical step involved in determining the effectiveness of the camera you will install. It consists in determining the right spot to set up the device. It would be best if you chose a high position that will enable the camera to maximize coverage. Also, the installation spot you want should minimize the length of the cable because long cable length affects the quality of the video. For indoor installation, you should consider a corner in the room where coverage of the entry and operation in the place are maximal. Also, fixing the power socket should be in proximity. For outdoor, consider installing the camera at a higher point, which covers surrounding to the optimal. The camera should not directly point to a light source because it affects the exposure of images and video captured. Lastly, you should install a camera near a power source.
Mounting the camera

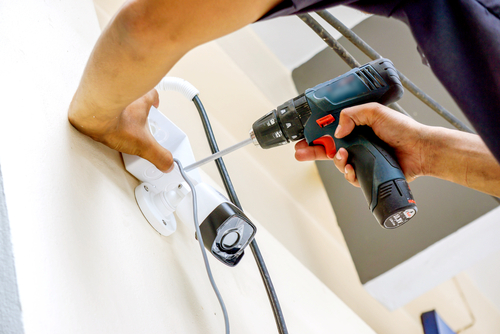
Mount the camera unit in the desired position and make marks that will guide in drilling. You then drill holes and hammer in the screw moldings. Screw up the camera firmly and let it point in the right position and angle. The positioning of the camera should provide the best motion detection.
Place the DVR

This step is very vital for ensuring a secure security system for a home or business. The DRV houses the surveillance hard disk that holds all the recording of the camera, making it a vital device. It’s advisable to place this device in a locked compartment to prevent intruders from destroying the video recordings.
Managing the cables

At this step, you should assign a pathway for all the wires running from the camera to the DRV unit. It would help if you considered using the nearest route, especially when doing an installation with comprehensive area coverage. For safety purposes, manage the wire using the wire moldings. Now put the surveillance wires inside the pathway created by nailing the frames along the path. It prevents the cables from wearing out.
Connecting the wires

The cable wire consists of two wires together with their connectors. The BNC connector connects to the video recorder of the camera while the PT-3 connector connects to the power supply. You can plugin on different sockets or create a specific power source for the cables for the power supply wires. The BNC connectors are connected to the monitor after connecting the BNC connectors to the DVR/NVR recorder. You can view all the images captured by the camera on the monitor.
Power on the system

The next step after connecting the wires is checking if the system can, fortunately, get the power supply. Power on the camera, display, and the DVR to check if there is a live video feed from all the cameras connected. You should ensure each camera is performing and provide your desired view angle. If it does not, you should recheck the above steps to ensure proper connection.
Setting up the camera system you have installed.

Setting up the CCTV camera is the last step in a complete camera installation. Camera set up enables you to access your video camera by computers, tablets, or smartphones. Some manufacturers of cameras offer apps and software that you can install on your devices and access your camera. Setup intelligence features like motion detection video recording, live to vie, and more on the app to befit your needs. Also, many camera settings have set up options of sending you emails and notifications in case anything unexpected happens. I.e., a home break-in
7 Important CCTV Installation Steps – Conclusion
If you’re planning to install a camera in your home or business, you should follow the above steps. They will guide you on installing the cameras effectively for extensive-angle coverage. If you power on the systems and don’t see any videos from the connected cameras, repeat all steps to check out for connection error.


